Add pictures to Hotmail messages
In a previous tutorial, we explained how you attach files to emails with Hotmail; this tutorial will explore Windows Live Hotmail's dedicated tool to insert photos and images in your emails. We will also guide you through the one-time installation of Hotmail's image upload tool (the "Windows Live Experience add-on").
When you attach files to your emails, Hotmail does not display the image inside your email: instead, the picture is available as a double-clickable or separately preview-able file. (The exception is Apple's Mac Mail, which displays image attachments inside the email and as downloadable attachments.) This Hotmail tutorial explains how to "add" (vs. "attach") pictures to your email, so that they are displayed inside the body of your email.
The following section explains how to install the tool that will let you upload and manage your images; if you have already installed the add-on, you can skip to the portion of this tutorial that shows you how to actually add pictures to your email from Hotmail.Are you trying to add an image to your Hotmail email signature? If so, this is best done straight from the signature editor, to spare you from adding a picture below your signature every time you send an email from Hotmail. Learn how to add an image to your Hotmail email signature.
Installing Hotmail's image upload tool
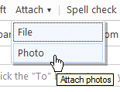 Click New to compose a new email: then, from the new email editor window, click on the Attach menu link, and choose Photo. The first time you perform this action, Windows Live Hotmail will display the following message: "The Microsoft Photo Upload Control makes it easier to preview, rotate, and resize photos before you attach them. You can also attach multiple photos to a message".
You will also see Internet Explorer's yellow information bar at the top, asking you to confirm the installation of the Windows Live Experience add-on:
 Click on the information bar, and, from the menu that appears, choose Install this add-on for all users on this computer. Depending on your settings, and whether you use Windows XP, Vista, or Windows 7, you may see a final UAC confirmation prompt ("User Account Control"), and a popup: click on the popup window's Install window, and Hotmail will add this extra functionality on the computer you are using.
Adding a picture to your email
Now that you have installed Hotmail's image manager/uploader, go back to creating a new email, and again, click on Attach > Photo. This time, Hotmail will display the content of your Pictures folder ("My Pictures" on Windows XP).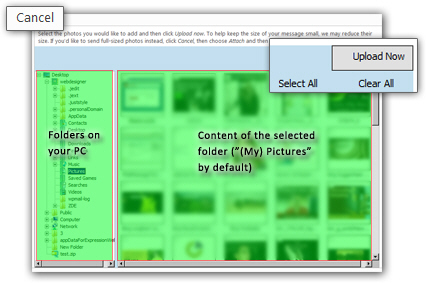
Windows Live Hotmail's image management tool displays a Cancel button in the top left corner: click it to go back to the email editor without adding a photo. In the top right corner, Hotmail shows a Select All and Clear All button. Click Select All to include all images inside the current folder in your email; Clear All will unselect any images whose checkbox is currently checked (and would therefore be uploaded for integration in the email).
You will use the Upload Now button once you have selected (and optionally edited) the images you would like added in your email.
The text Hotmail displays at the top reads "Select the photos you would like to add and then click Upload now. To help keep the size of your message small, we may reduce their size. If you'd like to send full-sized photos instead, click Cancel, then choose Attach and then File". This is because the image upload tool will actually resize your image down (which reduces its file size, thus the size of your email), and place it inside your email. Note that Hotmail will not resize your original picture: only the copy of it Hotmail adds to your email.
Selecting images to place in your email
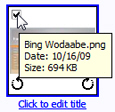 Choose the image you want to add to your email by checking its checkbox: notice that Hotmail also displays a Click to edit title link.
![]() If you click it, it will allow you to rename the picture: just type a new name for the picture, and hit Enter. (Note that Hotmail's image management tool actually renames the photo on your computer, not just the file name of the image you will end up adding attached to your new email.)
If you click it, it will allow you to rename the picture: just type a new name for the picture, and hit Enter. (Note that Hotmail's image management tool actually renames the photo on your computer, not just the file name of the image you will end up adding attached to your new email.)
Tip: You do not have to click directly on the checkbox: clicking on the image thumbnail itself will check or uncheck the corresponding checkbox.
Rotate pictures (within Hotmail!)
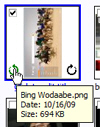 Notice that once you hover your mouse cursor above one of the images displayed in your Pictures folder, Hotmail also displays in the thumbnail icons for rotating arrows.
The counter-clockwise arrow button will rotate the picture 90 degrees to the left (counter clockwise, as shown on the screenshot); the clockwise arrow rotates the image 90 degrees to the right (clockwise).
To undo the rotation (which affects the original photo file on your PC), simply click the other rotate arrow button, and Hotmail will restore the original landscape or portrait orientation of the picture.
Upload the images you want in your email
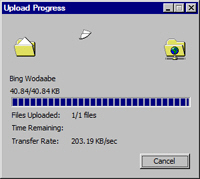 Once you are done choosing the pictures you want to add in the email, click the Upload Now button: Hotmail will open the Upload Progress dialog, which sends your images to Hotmail's servers. The upload process time varies based on the speed of your internet connection, the size of your photos, and the number of files you have selected.
Since Hotmail optimizes the images for display inside an email, larger pictures will be actually converted to a smaller size; as we saw above, if you want to send an image file in its native dimension and resolution, choose Attach > File instead of Attach > Photo: another tutorial explains in detail how to attach files to your emails in Hotmail.
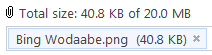 Once the image has successfully been uploaded, Hotmail will bring you back to the email editor, where you can add recipients, a subject, and resume typing your email. Notice that, below the subject line, the attachment information bar is displayed, indicating the current attachments you have in your email, and their total size.
Email your inline images
Once you are done, click Send: Hotmail will send the email with the images inside your email (or "inline"), as opposed to having the images emailed as file attachments, which need to be opened separately or downloaded to view. While the quality of your photos has been reduced, as well as their dimension, this is the best way to send informational images through Hotmail. You will use instead the actual file attachment process to send pictures whose dimensions and quality/resolution must remain intact.
Below is the screenshot of the email as it will appear to your recipients: notice that the picture you added are displayed both as a downloadable file (like regular email attachments), but is also displayed "inline", with the image inside the body of the email, right below any text you typed. (Unlike us, don't forget to add an extra blank line at the end of your email content to avoid having the first photo crammed against the last line of text of your email.)
Notice that the high-quality screenshot was an uncompressed picture, but that the resolution of the image Hotmail added to the email was scaled down (JPEG 70-80%, where 100% is a lossless version of the image). The blown up callout displays a detail of the photo, and illustrate how lower quality the images added inline are, as opposed to the original file; but given how convenient it is to
If you want a high-quality, graphic-rich newsletter, please consult our email marketing tutorial, that goes over topics like email newsletter design, where photos and support images are linked to online files of the quality you define, while visible inside the email (inline).