Free Email Tutorials › Gmail › Remove the color of a label in Gmail
Remove the color of a label in Gmail
Whenever you create a label in Gmail, it will automatically apply the default color, which is barely perceptible (at least with some themes). And you can at any point change label colors to make each of them easier to spot in your inbox, for example. But, as you'll learn in this tutorial, Gmail also lets you to remove a label's current color with just a couple of clicks. For reference in this tutorial, here is a custom label with a custom label color applied to it:
Remove label colors in Gmail
- Once you are inside your Gmail inbox, all system labels (Inbox, Buzz, Starred, Chats, Sent Mail, Drafts, All Mail, Spam, and Trash) and custom labels (those you created yourself) will be listed in the left pane. If you have more labels than can be displayed at any time given your current screen resolution, some labels will be visible only when you click on the "X More" menu at the bottom, to reveal the excess ones.

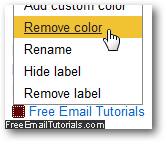
- Once you have found the email label whose color you want to remove, click on its color swatch (the small square on the left of its name), and Gmail will open a contextual menu. Click on the "Remove color" menu item, as shown below:

- As soon as you do, Gmail will update the color swatch to a light gray in the labels listing, and all email messages visible inside your inbox will be updated to still show the same label, but this time using the default label color scheme:

(Compare this default label color with the custom we had in the screenshot at the top.) - So, whether you remove the color from a label, or create a new label without specifying a standard or custom color after the fact, Gmail will use the default label color.
And this is how you reset a label to using the default color.