Create an email signature in Windows Live Mail (HTML or plain text)
![]() This free email tutorial shows you how to setup a custom email signature in Windows Live Mail. Instead of signing your name, job title, and contact information every time you send an email, let Windows Live Mail take care of it for you with automated email signatures. We will show you how to create an email signature, make it your default signature, and associated signatures with specific email accounts.
This free email tutorial shows you how to setup a custom email signature in Windows Live Mail. Instead of signing your name, job title, and contact information every time you send an email, let Windows Live Mail take care of it for you with automated email signatures. We will show you how to create an email signature, make it your default signature, and associated signatures with specific email accounts.
Add an email signature in Windows Live Mail
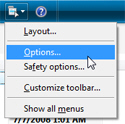 Adding an email signature in Windows Live Mail is done through the Options dialog: to open the email signature options, click on the Show Menu button, and click Options. If you have traditional menus visible (hidden by default), you can also go to Tools > Options.
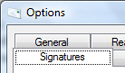
Windows Live Mail's Options dialog will open: click the Signatures tab. This is the one-click stop from where you will create, delete, and manage your email signatures - everything covered in this tutorial.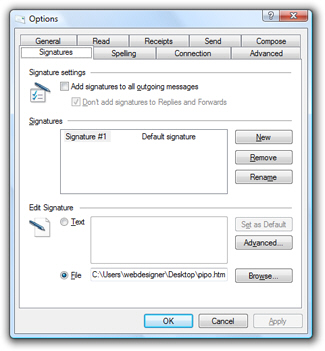
The Signatures tab is divided in three sections: the "Signature Settings" determines when to add a signature to your outgoing emails; the section labeled "Signatures" stores any signature you created, and lets you add, delete, or rename signatures. The last section, "Edit Signature" lets you customize the selected signature's settings.
 All email signature options and settings available in Windows Live Mail are conveniently located under the same tab: anything related to email signatures is there. The only exception, explained in the next tutorial, is the manual insertion of a signature from a new email window.
![]() To add or create a new signature in Windows Live Mail, click the New button; this will automatically create a new, blank signature called "Signature # 1" - if this is your first signature, Windows Live Mail will make it the default signature.
To add or create a new signature in Windows Live Mail, click the New button; this will automatically create a new, blank signature called "Signature # 1" - if this is your first signature, Windows Live Mail will make it the default signature.
Create a plain text or HTML email signature
Your cursor automatically blinks in the text field under Edit Signature, to let you type the signature text. This is the easiest signature to setup: just type the text you would like to appear as signature, no formatting is available, only plain text, spaces and new lines.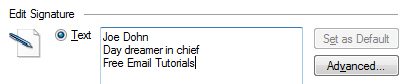
If you want a more sophisticated email signature, you can import an "HTML" file: this format can include formatting information to add colors, bold, italic, or even images to your signature. To do so, just select "File" instead of "Text" under Edit Signature, and pick an HTML file that contains your rich format signature.![]()
Rename an email signature in Windows Live Mail
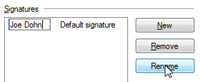 Once you are done, make sure to give your email signature a meaningful name: click the Rename button, type a signature name and hit Enter.
That's it! You now have a fully functional email signature in Windows Live Mail.
Delete an email signature in Windows Live Mail
![]() To permanently delete an email signature from Windows Live Mail, select the signature, and click the Remove button. If any email account was using this signature, it will revert to using your default signature instead.
To permanently delete an email signature from Windows Live Mail, select the signature, and click the Remove button. If any email account was using this signature, it will revert to using your default signature instead.
To learn how to customize your email signatures in Windows Live Mail, set your default signature and assign signatures to email accounts, please see our next tutorial: email signature settings and options in Windows Live Mail.