Opera Mail's Interface
The whole Opera experience is consistent, so that learning to use Opera Mail also familiarizes yourself with RSS feeds in Opera, etc. By default, Opera uses only one window, with tabs to switch from a web page to your emails, to RSS feeds or a chat session.
Opera Mail's Main Window
To show Opera Mail's main window by going to Mail > Read Mail. To show the Side Panel, go to View > Toolbars > Panels.
F4 Show / hide the Side Panel
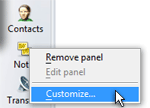 Note that the Mail and Contacts panels are only available after you have setup at least one email account in Opera Mail. To view a listing of available panels, right click on the Panel and choose Customize: check or uncheck the appropriate boxes.
Like the Mail and Contacts panels, the Chat panel can only be checked when you have at least one chat account.
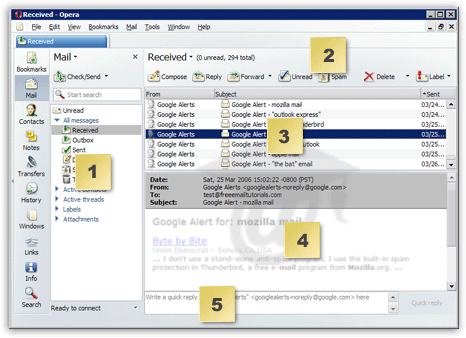
- 1 The Mail Panel - This where all your email folders are. Each triangular arrow on the left means that the folder contains sub-folders. In the screenshot above, the All messages folder reveals Opera Mail's default sub-folders: Received, Outbox, Sent, Drafts, Spam, and Trash. These are really Virtual Folders, but we come back in detail to that innovative concept.
- 2 The Mail Toolbar - This toolbar will allow you to perform 80% of your daily email manipulations. You may not see the exact same buttons, but we will show you later how to customize Opera Mail's toolbars.
- 3 The Top Pane - This container shows you the content of each virtual folder you select on the left. In your case, it might be currently empty.
- 4 The Bottom Pane - This container populates itself with the content of the email selected in the top pane. (If no email is selected, it will read "No email selected".)
- 5 The Quick Reply - This text box and button allow you to reply very quickly to an email without have to click "Reply" as in other email clients. (We will show you later how to display or hide it.) The Reply button is always an available option.
Note: the above screenshot shows Opera Mail with the default skin, "Opera Standard". Most screenshots in the remainder of our Opera Mail tutorial will be taken using the "Windows Native" skin, (which comes bundled with Opera), to ensure a high-enough contrast for all our visitors.
Opera Mail's Side Panel
 After you finished setting up your email account in Opera Mail, the side panel should have opened from the left or right of Opera.
If the panel is not visible, go to View > Toolbars > Panels. The panel is a "container" that gives you access to many tools, built-in and custom. As far as Opera Mail goes, the panels contain the email "folders" and address book where your contacts are stored.
F4 Show / hide the Side Panel
Opera Mail's Side Panel Buttons
 In this tutorial, we will only cover the panel buttons that have a direct implication with Opera Mail, namely the Mail and the Contacts side panel buttons.
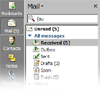
The screenshot on the left shows Opera Mail's side panel in context, docked against the left corner of the window.
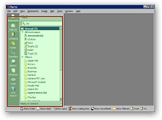
If the side panel's Mail or Contacts buttons are not visible, right-click on the side panel and choose Customize. Check the checkboxes next to these two button names and click OK.

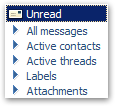 Clicking the Mail button will reveal the default email categories (or "virtual folders") built into Opera Mail: Unread, All messages, Active contacts, Active threads, Labels, and Attachments.
Later in our Opera Mail tutorial, we will cover in detail the concept of Virtual Folders. For now, just notice that they appear with a click to the Mail button.
 The Contacts button pulls its own panel out, and will store your contacts' email addresses and personal information. Contacts will be covered in more details in our tutorial dedicated to Contacts management in Opera Mail.