Setting up an POP3 or IMAP email account in Mozilla SeaMonkey Mail
First, you need to launch the SeaMonkey Mail email client.
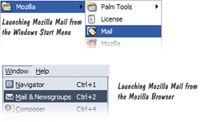 You can either go to Windows Start Menu > Program Files > Mozilla, and then pick Mail. The name of the folder in your start menu will depend on the name you chose for the Start Menu folder, during your installation. By default, this folder should be called mozilla.org.
Another way is to call SeaMonkey Mail from the browser window: go to Window > Mail & Newsgroups.
Ctrl+2Launch SeaMonkey Mail from the browser
Create Your Email Account
If you want to use SeaMonkey Mail with an email account you have already setup in Microsoft Outlook, Outlook Express, or Qualcomm Eudora, see how you can import settings in SeaMonkey Mail instead. It will be save you quite some time.
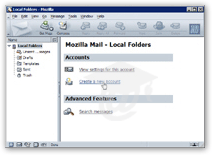 Once SeaMonkey Mail opens, click the Create New Account link on the right pane.
The SeaMonkey Mail wizard will guide you through the steps necessary to connect to your email account. Your mail provider should have provided you with the required information.
We will use standard email account information. But in most cases, using your email provider's domain name when we use "freeemailtutorial.com" by will do the trick.
Email Account Information
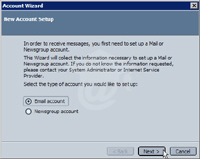 Choose Email Account and click Next Choose Email Account and click Next | 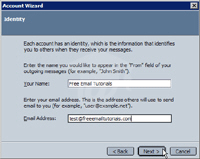 In the first input field, enter your name, as you would like it to appear when people receive emails from you. In the second field, enter your actual email address: user@domain.com In the first input field, enter your name, as you would like it to appear when people receive emails from you. In the second field, enter your actual email address: user@domain.com |
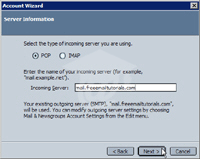 Choose your email account type. Most likely, your email account is POP3. This tutorial focuses on POP3, but the difference with IMAP at this level are not major. Then enter your incoming mail server. Choose your email account type. Most likely, your email account is POP3. This tutorial focuses on POP3, but the difference with IMAP at this level are not major. Then enter your incoming mail server. | 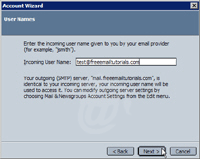 Enter your Incoming User Name - depending on your provider, it could be either the part of your email address that comes before the @, or the complete email address. Enter your Incoming User Name - depending on your provider, it could be either the part of your email address that comes before the @, or the complete email address. In theory, it could be something completely different, but this is unlikely. |
SeaMonkey Mail supports both POP3 and IMAP email accounts. If you must use IMAP, simply select IMAP instead of POP3. IMAP and POP3 are email protocols, whose coverage is beyond the scope of our SeaMonkey Mail Tutorial. No difference as far as setup goes. | |
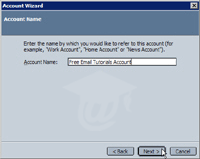 SeaMonkey Mail asks you for a user-friendly name for your email account. SeaMonkey Mail asks you for a user-friendly name for your email account. This comes in handy when you have more than one email account. (Instead of calling them all mail.yourProvider.com, use something like Jenny's Mail, etc.) | 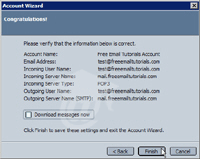 This final screen gives you a summary of all the options you picked and value you created. It is easier to take the time now to double-check what you entered. This final screen gives you a summary of all the options you picked and value you created. It is easier to take the time now to double-check what you entered. If needed, click the Back button to update or correct information, the wizard will remember all your values, (you will not have to re-enter everything.) |
| Downloading messages from the server - There is a Download Messages Now checkbox: if checked, SeaMonkey Mail will download your messages and remove them from the email server. | |
Changing Your Email Account's Behavior Later On
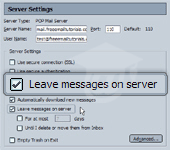
You can change SeaMonkey Mail's mail server settings after the initial configuration of your email account:
• Go to Edit > Mail & Newsgroup Account Settings.
• Check or uncheck Leave messages on server.
• Click OK to confirm your change.
(SeaMonkey Mail actually lets you have different settings for different accounts. We will cover later in depth email accounts customization in SeaMonkey Mail.)