Address book and contacts in SeaMonkey Mail
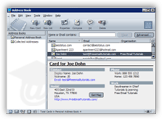 SeaMonkey Mail includes an internal address book application to conveniently manage your contacts from a single location. While you'll most likely only use recipients' names and email addresses, SeaMonkey can become your "PIM" (personal information manager), as it contains enough fields for each contact profile to keep track of anything you could think of! Notice on the screenshot how a contact is selected (top right), and its card is loaded (bottom right). On the left, you can even organize your contacts by groups. Because the address book is fully integrated in the SeaMonkey suite, you can use its data anywhere; quickly launch it from any SeaMonkey application by pressing the Ctrl+5 keyboard shortcut (or choosing "Address Book" under the Window menu).
Tip: if you are migrating from another email program, save yourself time by directly importing your contacts (instead of creating them one-by-one, manually, in SeaMonkey!)
Tip # 2: use the Ctrl+2 and Ctrl+5 keyboard shortcuts to quickly switch between SeaMonkey Mail and the address book (note).
Create a contact
 To manually create a new contact in SeaMonkey Mail, go to File > New > Address Book Card - or click the New Card button in the address book window (pictured left). This will open a blank address form: add at least one or two pieces of information about the contact, and click OK to save. You can also quickly add a contact using an email message you received from that person; just right-click on their name/address in the email headers, and choose "Add To Address Book":
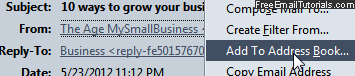
Using multiple address books
 SeaMonkey Mail supports multiple address books: you will still access all contacts from the address book window, but you'll be able to separate contacts by, for example, teams at work, or personal connections, etc. By default, SeaMonkey includes automatically two address books: one called "Personal" (where contacts you create go by default), and the other called "Collected Addresses" (where SeaMonkey stores the addresses of people with whom you've exchanged one or more emails).
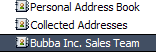
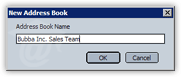 To add an address book, go to File > New > Address Book (this option is only visible in the Address Book window). Type a new, unique address book name and hit Enter / Return. As soon as you do, it will appear on the left pane: click on it to open it and start adding contacts for it!
Email Distribution Lists (or "contact groups")
 SeaMonkey Mail also supports "Lists": use that list's nickname to email an entire group of email addresses you've previously added to it - great time saver if you frequently send messages to the same group of friends or colleagues! To create a new email distribution list, go to File > New > Mailing List (only visible from the address book's File menu), or click the New List button (pictured left).
Caution: each contact or email address you add to a mailing list becomes its own "entity". If a person's email address has changed, for example, remember to update it everywhere you've used it (their main card, inside mailing lists, etc.)
Address Cards in SeaMonkey Mail ("v-cards")
Your contacts are, behind the scenes, organized in "v-cards", like virtual business cards: opening a contact displays all his/her information in a nice, clean layout, and transforms any email address or internet address (URL) into clickable links, as shown below. Also notice the "Get Map" button: clicking it will open the contact's physical address in Google Maps! 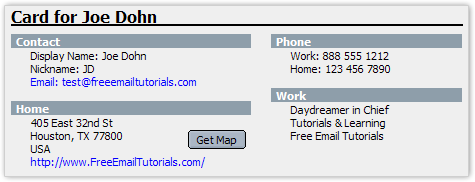
Search for your contacts
 To find long lost contacts, the SeaMonkey Mail address book includes a advanced search tool that lets you filter results by pretty much any information field you can think of. It is simple enough not to warrant a tutorial, but know that it exists, and can be accessed by going to Tools > Search Addresses in the address book window.