Use and customize the SeaMonkey Mail Toolbar
The SeaMonkey email program's "Mail toolbar" contains all the command you're likely to need: all these commands are also available under the various menus, but also have a quick keystroke to trigger their action: we added a short listing of corresponding keyboard shortcuts at the bottom of this tutorial. Grayed out buttons (disabled) indicates that the corresponding command is not available at the current time: typically, this means that no message is selected for a command that requires at least one message to be selected.
Tip: if you can't see the Mail toolbar, click on the View menu and select "Show/Hide" and "Mail Toolbar". You can also expand or collapse this and other toolbars by clicking on the up arrow button on the left of the window, like this: (notice cursor position)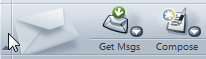
The Mail toolbar's default buttons
Here are the default / most common buttons in the Mail toolbar: if you don't one of them, or want to remove existing ones, just right-click on the toolbar and choose "Customize"; then, drag onto the toolbar the buttons you want to add, or drag away from the toolbar those you want to remove! (You can always add them back on later, using the same steps.)
 | The Get Messages button ("Get Msgs") lets you check for new messages on the mail server. SeaMonkey also checks the server automatically, at a user-configurable interval. The dropdown arrow on the right allows you to selectively update individual email accounts. SeaMonkey will by default look for new messages when it starts (when the entire suite starts, which could be by launching the web browser). |
 | The Compose button creates a new, blank, message - with its body optionally pre-populated with your default email signature. |
 | The Reply button responds to the currently selected email. This new message is only addressed to the actual sender of the email, unlike the next command. |
 | The Reply All button replies to both to the email's original email and all the other recipients of that message. Example: Jack sends an email to you and some colleagues about the next office party: by clicking "Reply All" you'll reach Jack as well as all other guests! |
 | Enabled only when an email is selected in the right pane, the Forward button allows you to forward the email or emails currently selected to another recipient.
Tip: if multiple emails are selected when you invoke that command, SeaMonkey will forward all of them as attachments! Note: when you press the Ctrl+L keyboard shortcut for forwarding emails, or click on the forward button, SeaMonkey will use the default mode for a single email: "inline", or as an attachment. You can change that by choosing a new default using the Forward button's dropdown arrow, like this: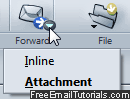 |
 | Clicking the File button (not to be confused with the File menu), shows a dropdown menu with all email folders available in SeaMonkey Mail. By navigating to the appropriate folder, you can file ("move") the email(s) currently selected. Very handy if you have more folders than you can see in the current view. Tip: you'll also see a "Recent" submenu, which keeps track of the latest folders in which you've filed emails - useful to counter folder galore! |
 | A click on the Next button will automatically select the next unread email in the current folder (skipping any read messages in-between), and go back to the top of the folder if needed. If there are no more unread emails in the current folder, SeaMonkey Mail will ask you if you want to read unread emails in the next folder that contains unread emails. Very practical! |
 | The Junk button toggles the spam status of the selected email(s) and controls how SeaMonkey treats them: pictures inside messages can allow the sender to determine know that the email was read (that your email account is active). SeaMonkey Mail and other email clients have started blocking images when an email is perceived as junk, to protect your privacy and fight spam. |
 | The Delete button moves the currently selected emails to the Trash folder, from where you can recover them if deleted by accident. Once messages are deleted from the Trash (or you empty the Trash folder), they are gone for good. |
 | The Print button lets you print the email currently selected; if multiple messages are selected, SeaMonkey will print them back-to-back, as separate print jobs, with each email starting on its own new page. The dropdown arrow lets you "Print Preview" - and see how the printout will look on paper. |
 | The "Stop" button cancels the current message transfer, but only works for downloading new messages from the server, not to prevent you from sending an email already in the outbox. That button is grayed out (as shown on the screenshot) when no messages are being downloaded from the server. |
Keyboard Shortcuts Summary
Functions covered above can also be performed using keyboard shortcuts. ("Ctrl+M" means "Hold down the control key and at the same time press the M key.") These basic shortcuts work for Windows and Linux; on Mac OS X, the control key ("Ctrl" ) is usually substituted for the command key ("Cmd") - in doubt, find the command and its equivalent shortcut (if any) will be listed next to the command name (see a list of all SeaMonkey Mail keyboard shortcuts).
Ctrl+T Get new messages for the current email account
Ctrl+Shift+T Get new messages for all email accounts
Ctrl+M Create new, blank email
Ctrl+5 Open the Address Book (character 5, not numerical keypad)
Ctrl+R Reply to the currently selected email
Ctrl+Shift+R Reply to all: email sender and recipients
Ctrl+L Forward the selected email
Del Delete the selected email (move to "Trash" folder)
J Mark the current message as spam
Ctrl+P Print the current email (go to "File > Page Setup" to customize your printing options)