Backup your SeaMonkey profile + Restore from file
 If you use SeaMonkey Mail, it makes even more sense to regularly backup its data, since you also likely use the address book or web browser - backing up your entire profile will then take care of messages, contacts, browsing history, etc. MozBackup works with Windows 7 / Vista / XP - for Linux and Mac OS X, just create a copy of the "SeaMonkey" folder (which is inside the "Mozilla" folder under your profile), and transfer onto a portable media drive or server. Here are your folders, for manual backup purposes:
| Windows 7 / Vista | C:\Users\UserName\AppData\Roaming\Mozilla\SeaMonkey\ |
|---|---|
| Windows XP / 2000 | C:\Documents and Settings\UserName\Application Data\Mozilla\SeaMonkey |
| Mac OS X | ~/Library/Mozilla/SeaMonkey |
| Linux | ~/.mozilla |
Explained in this tutorial: Install MozBackup | Backup your profile | Restore your profile
Note: since the SeaMonkey installer will reuse by default your previous installation settings, these folder locations may vary. Depending on how long ago you installed SeaMonkey, it may still store its data under a "Mozilla" folder.
Installing MozBackup
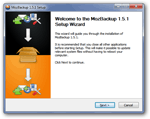 If you've already installed MozBackup on your PC, skip to the next section: backing up SeaMonkey. Otherwise, go to the official download page, and click to run the installer (easier), or download the zip file and extract it (advanced users). Either way, once the download has completed, launch the setup file. Keep the default options, click several times the Next button, until the last step; uncheck the "Run..." checkbox, and click Finish (note).
You are now ready for the next step:
Backing up your SeaMonkey profile data
Start by exiting SeaMonkey, to avoid any file-in-use conflicts, and wait 5-10 seconds; launch MozBackup from the start menu or desktop shortcut: click on the Next button.
Make sure that "Backup a profile" is selected (we explain restoring your data from a backup is explained in the next section), and pick "SeaMonkey [version / language]"; click Next.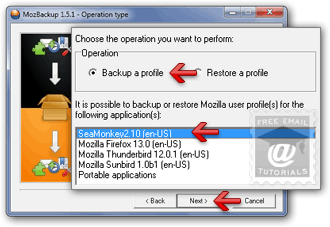
On the next screen, ideally keep the "default" choice (click the "Portable" button if you use SeaMonkey from a portable hard drive or USB key, to browse for the location of that roaming data). Optionally pick another folder to store the backed up profile, and click Next.
 If you want to password-protect your
 PCV backup file, click "Yes", supply the desired password twice, and click OK - otherwise, click "No". The following screen contains a breakdown of the data to backup (remember, this tool backs up your entire profile, not just emails and contacts). To make restoring from a backup easier, we recommend to keep the default (which will copy everything).
To backup SeaMonkey Mail only: uncheck every checkbox, except for "General Settings", "Emails", and "Address books".
Click Next: within a few seconds, all that data will have been exported to a "PCV" file in the target folder of your choice; click "Finish" to exit MozBackup.
How often should you backup? The more you use SeaMonkey, the more data will be lost since your last backup in case of hard drive crash, stolen laptop, etc. If you use SeaMonkey Mail daily (especially when using a POP3 email account (vs. IMAP), if new messages are deleted from the server after they've been downloaded), you should probably backup every week.
Restore your SeaMonkey profile from backup
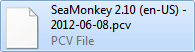 Your
Your PCV backup files are timestamped, as shown on the screenshot; if you aren't sure when a certain backup was created, look at the last 10 characters of the file name, not the "modified date" property of the file itself (this is not always reliable for files and folders that have been moved across networks, copied from other computers and/or drives, etc.) Exit from SeaMonkey Mail and all other applications of the suite (File > Quit, or the Ctrl+Q keyboard shortcut, will do the trick).
Caution: to be on the safe side, we recommend that you always create a backup of SeaMonkey in its current "form" before you restore data from another backup file. This gives you a way to backtrack, should anything bad happen (which should not!)
Launch MozBackup, and click Next. Select "Restore a profile", and pick "SeaMonkey" at the bottom - click Next. Typically, keep the default selection at the top; if you want to restore from a particular backup file, click on the "Browse" button and navigate to it.
Click Next, and enter the backup password if needed; to avoid conflicts between data across time, you should ideally restore everything, or at least everything that is related (restore contacts at the same time you restore emails, for example, since these two types of data are related). Click Next, and click Finish when the process is complete.