Using Mailboxes in Apple Mail
Apple Mail lets you create mailboxes in addition to the built-in ones: In, Out, Drafts, Sent, Junk, and Trash. If you add more than one email account in Apple Mail, it will automatically create sub-mailboxes to the In and Junk mailboxes, (as many as you have email accounts.)
If you are accustomed to using another email client like Outlook Express or Mozilla Thunderbird, Apple Mail's "Mailboxes" correspond to what these email clients call "Folders".
Creating a New Mailbox
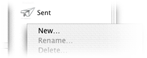 To create a new mailbox, control-click (or right-click) underneath pre-existing mailboxes, and choose New; alternatively, you can create a new mailbox by going the to Mailbox menu and clicking New.
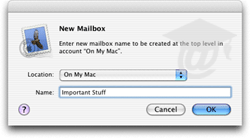 A window will popup and let you name the new mailbox; by default, it will create a mailbox on your hard drive, ("On My Mac.")
Apple Mail will let you choose pretty much any name for your new mailbox. However, aside from picking a descriptive name that will retain its relevance in six months, short names will spare you from having to pull out the drawer too much.
 A mailbox has been created; by default, your mailboxes will look like blue filing folders. You can technically create as many mailboxes as you want, enough to keep your emails organized.
Creating "Sub-Mailboxes"
You can create subfolders (or sub-mailboxes) simply by control-clicking/right-clicking on the mailbox, and choosing mailbox.
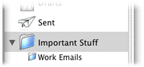 If a mailbox has subfolders (sub-mailboxes), a triangular arrow will be visible on its left. Toggle the visibility of the sub-mailboxes by clicking the triangle. Sub-mailboxes are smaller than their parent mailbox, and slightly indented to show their relationship with the parent mailbox.
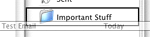 To store new emails in your new mailbox, simply drag them and drop them above the mailbox's blue folder icon.