Setup Gmail in Windows Live Mail (Email Account Setup)
 Windows Live Mail & Gmail — Started only a few years ago, Gmail (also know as "Google Mail") is Google's email and webmail offering. Gmail supports both POP3 and IMAP email protocols, and can be used either from a web browser, or from a desktop email program like Windows Live Mail. This tutorial will show you how to setup Gmail as an IMAP email account in Windows Live Mail; note that you will still be able to check your Gmail emails from a web browser, as before.
Gmail has in a few short years become the third largest web-based email service provider, behind Yahoo! Mail and Windows Live Hotmail.
Setting up Gmail in Windows Live Mail
Setting up your Gmail email account in Windows Live Mail is a streamlined process.
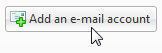 When you first you run Windows Live Mail, the "Add an E-mail Account" dialog automatically opens. If it doesn't appear, or if you already have setup email accounts aside from Gmail, locate the "Add an e-mail account" button in Windows Live Mail's left pane; click this button to open the email account wizard:
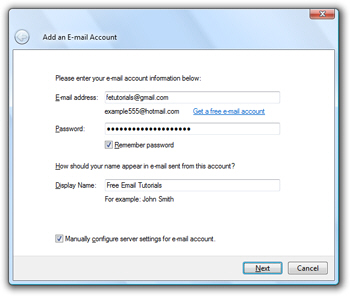
Before you can use Windows Live Mail and Gmail together, you need to enable IMAP in Gmail itself. Click the Settings link in Gmail, and the Forwarding and POP/IMAP tab: choose Enable IMAP, and click the Save Changes button: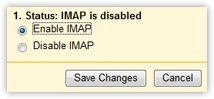
Enter your Gmail account information
Under "E-mail address", type your full Gmail email address in the format yourUserName@gmail.com. Enter your Gmail password in the second field. By default, Windows Live Mail will remember your Gmail password; you can uncheck the "Remember password" checkbox.
The last field ("Display Name") determines how emails you send appear to recipients (in their "From" field). The display name can be anything, and doesn't have to match your Gmail email address; your choice of display name doesn't affect your Gmail account itself, only emails you send through Gmail from Windows Live Mail.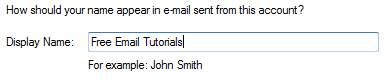
Check the "Manually configure server settings for e-mail account" checkbox if you want to manually setup Gmail in Windows Live Mail. Because Gmail is a popular email provider, Windows Live Mail knows how to automatically set it up for you.![]()
Click Next: if you chose to let Windows Live Mail configure your Gmail account for you, you can skip the next three steps. Windows Live Mail has automatically configured Gmail for you: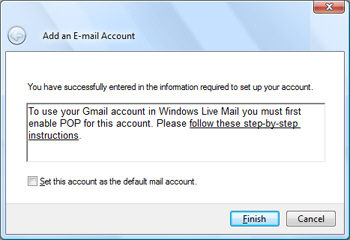
Enter your Gmail connection settings
In Windows Live Mail's connection settings screen, you will enter the information Windows Live Mail needs to connect to your Gmail account:
Gmail Incoming Server Settings
The first section deals with Incoming Server Information, or how Windows Live Mail retrieves your emails from Gmail's servers. Choose "IMAP" as server type. The incoming mail server value is imap.gmail.com, with port 993.
Check the "This server requires a secure connection (SSL)" checkbox. You can leave the default setting for logging on, which is "Clear text authentication". Under Login ID, enter your full Gmail email address, in the form userName@gmail.com.
Gmail Outgoing Server Settings
The bottom of Windows Live Mail's email account setup screen collects the Outgoing Server Information used by Windows Live Mail to send emails through Gmail: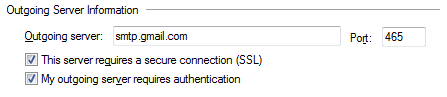
The outgoing server address is smtp.gmail.com, with port 465. Make sure to check the two checkboxes "This server requires a secure connection (SSL)", and "My outgoing server requires authentication", otherwise Gmail won't work.
Finalizing Your Gmail Account Setup
Click the Next button, you have finished setting up your Gmail account. If Windows Live Mail could successfully connect to Gmail, you will receive the following confirmation: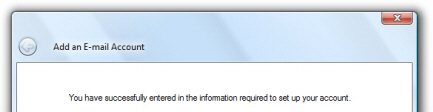
You can close the new email account setup wizard; the "Show/hide IMAP folders" dialog will automatically open: click Ok to get back to Windows Live Mail.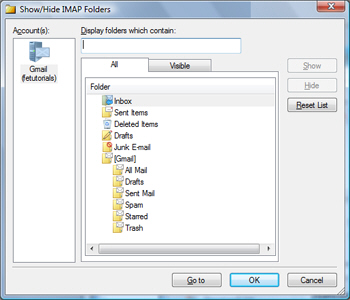
Gmail IMAP folders in Windows Live Mail
 If Windows Live Mail didn't give you this confirmation, it either means that your Gmail password was incorrect, that your Gmail email address has a typo, or that your Internet connection was faulty. Otherwise, your are ready to use your Gmail account in Windows Live Mail.
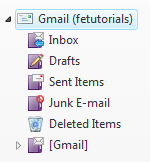
As soon as your Gmail account information is downloaded in Windows Live Mail, you will see your Gmail folders displayed in the left pane. Note that the usual Gmail folders ("All Mail", "Drafts", "Sent Mail", "Spam", "Starred", and "Trash") are all visible by expanding the [Gmail] subfolder in Windows Live Mail.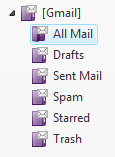
You are now ready to use Gmail as a regular IMAP account in Windows Live Mail. And you can still use Gmail from a browser when you are away from your main computer.