Create contact groups in Windows Live Mail
 This free email tutorial shows you how to create contact groups, or email distribution lists, in Windows Live Mail. If you find yourself regularly emailing the same groups of people, contact groups will make it easier to send an email to a group of contacts by selecting a contact group as recipient: instead of typing the email addresses of all the recipients, you instead only need to type the first few letters of the contact group, and select it as recipient, as you would with any email address.
Create a new contact group in Windows Live Mail
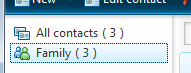
 Outlook Express and Windows Mail respectively use Windows Contacts (Vista) or Windows Address Book (XP) to store your contacts. Windows Live Mail uses its own address book, called "Windows Live Contacts". This is where all the contacts saved by Windows Live Mail will be stored.
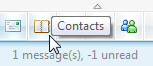
To launch Windows Live Contacts, click the address book icon in the bottom left corner of Windows Live Mail's main window, or use the following keyboard shortcut:
Tip: press Ctrl+Shift+C to quickly open the Windows Live Contacts window.
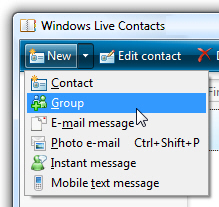 From Windows Live Contacts, create a new contact group by clicking on New, and choosing Group. You can also click the Create a new group button visible at the bottom of the left pane, where all your contacts are displayed:
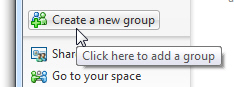
This will open the Create a new group dialog.
Enter the new contact group information
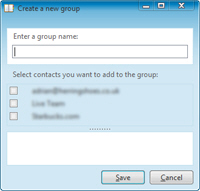 The Create a new group dialog contains three sections: type in your contact group name in the text field under "Enter a group name" - this is the name by which Windows Live Mail will refer to the contact group. Make sure to pick a memorable and descriptive contact group name.
Under "Select contacts you want to add to the group", pick each contact that should be part of this email distribution list; if you picked a contact by mistake, simply uncheck its name to remove it.
The third section lists the email addresses of the contacts you selected as contact group members.
When you have chosen a contact group name and members, click the Save button. Windows Live Mail will now have access to the contact group that has been added to your address book. To edit a contact group (to rename it or add/remove members), simply double-click on the contact group name in Windows Live Contacts.
Emailing a contact group in Windows Live Mail
The next time you want to send an email to the contact group ("distribution list") you have created, simply start typing the first few letters of the group name, and Windows Live Mail will help you by guessing the email recipient you want ("auto-completion").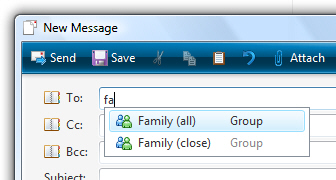
Notice that Windows Live Mail indicates the word "Group" along with the contact names it showed in auto-completion, to help you distinguish between regular email addresses and contact groups. If Windows Live Mail offers multiple recipients to choose from, simply click the contact you want to email, or use the keyboard's up and down arrow and hit [Enter] to select the contact group you want.
Removing email recipients from a contact group
![]() After having selected the contact group you want to email, it will appear in bold, with a plus sign, in the To, Cc, or Bcc field. Clicking the plus sign will expand the contact group into a listing of its members email addresses: you can then (for example) manually remove email recipients. This does not remove the email addresses from your contact group: it only removes them as recipient of the email you are composing.
After having selected the contact group you want to email, it will appear in bold, with a plus sign, in the To, Cc, or Bcc field. Clicking the plus sign will expand the contact group into a listing of its members email addresses: you can then (for example) manually remove email recipients. This does not remove the email addresses from your contact group: it only removes them as recipient of the email you are composing.