Hotmail Contact categories (Distribution Lists)
 Distribution lists, mailing lists, contact groups - you'll find many ways to describes groups of email addresses that can be used as an alias, or nickname, to quickly send emails to all their members. Hotmail calls them "Contact Categories". A contact category is not an email address, but a shortcut internal to your Hotmail account to select a single name to reach several email recipients. This tutorial shows you how to create a contact category, edit its email recipients, how to delete contact categories. Let's get started with this tut, and learn how to create a distribution list in Hotmail!
What is a Hotmail contact category? if you are running a home-based business, you may want to now and then keep in touch with your customers, and send them an email. Instead of typing each customer's email address - you guessed it: you just need to create a contact category (or "distribution list" / "mailing list") called customers. By maintaining it (adding or removing customers from the list as needed), you can send an email to multiple people with a very quick to type single nickname (the name of your contact category!)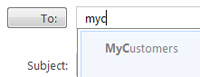
Create a Hotmail contact category (or "distribution list")
Older versions of Hotmail used to have a "Favorite Contacts" group, which used to show as a sidebar alongside several email screens, including the new email editor. Currently, Hotmail has a contact category automatically created with every Hotmail account, called "Favorites" - this contact category is empty by default.
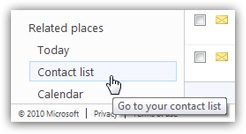 To access your contact categories, click on the Contact list link in the bottom left corner of Hotmail's main window (it is displayed, among other places, right below your email folder listing).
This will load your Hotmail address book, or "Contact list". The left side of the "People" screen displays several links and headers: notice the Categories header : unless you previously created contact categories, it will only show a single contact category link below it, the Favorites you now know about; (the screenshot below also shows two custom contact categories we created in the past).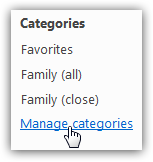
To create a contact category, click on the Manage categories link, which is always displayed below the listing of contact categories you have previously setup. Windows Live Hotmail will load the Manage Categories screen, which contains three commands, and the full listing of your current contact categories, including the number of people currently member of the corresponding contact category: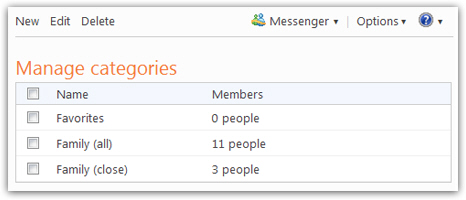
Create and name your new contact category
Click on the New button to make a new contact category: under Name, type the name by which you will refer to this contact group in the future - for this reason, try to pick a quick-to-type first few letters (Hotmail will auto-complete the rest of the name, as you'll see later in this tutorial). Then, hit Tab to move to the Members text box.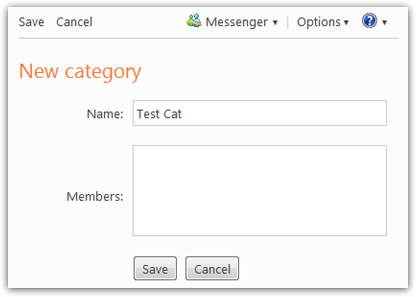
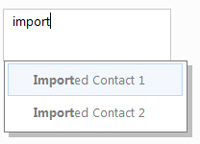 The Members text box is linked with your Hotmail address book (the "contact list"), so as soon as you start typing contact names or email addresses, Hotmail will try to match them with entries from your existing contacts (to save you some typing). This process works in exactly the same way as the automatically-completion that occurs when you are composing an email and typing email recipients. As soon as the desired recipient is highlighted, hit Tab, and Hotmail will insert the entire email address for you:
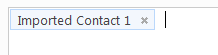
(Clicking the close button inside the contact category member will remove that contact from the contact category - again, a familiar process if you have already sent an email from Hotmail.)
Save your new Hotmail contact category
Once you have entered all the email recipients you want for this distribution list, click the Save button: this will create your new contact category, and make it available next time you send an email from Hotmail.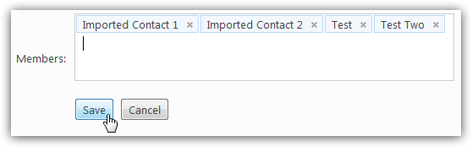
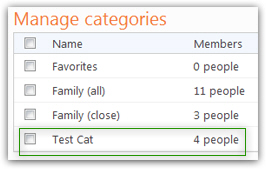 After saving your contact category, Hotmail will redirect you to the screen we came from, which lists all your contact categories; this time, your new contact category should be listed in the table, at the very bottom. (Quick tip: Hotmail displays your contact categories in the order in which they were created, not alphabetically).
On the screenshot, our "Test Cat" contact category is shown in the last row, with "4 people" registered as Members (these are the recipients whose names/email addresses we typed).
Edit a Hotmail contact category
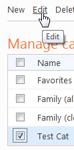 The checkbox on the left of the contact categories' names allows you to select the contact category/contact categories on which to perform an action, such as deletion or edition. To edit an existing contact category, tick its checkbox, and click on the Edit link displayed at the top of the Manage Categories screen.
In effect, this means that we are going to add or remove members from the contact category we choose to edit; this is why Hotmail brings us back to the contact category editor, where we can remove contacts (click on their Close button) from the group, or add new ones (simply start typing their name or email address). Note that deleting a member from a contact category doesn't delete it from your contacts, it only removes the person from the current contact category - and you can always add this recipient back to the category later on.
Rename a contact category
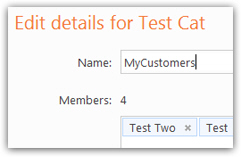 In this example, we will simply choose to rename our contact category: to do so, select the text currently displayed under Name, and start typing a new name for your contact category.
(You can also add or remove members from the contact list, if you want to test the feature.)
Then, click on the Save button to retain the changes you have made. (Hotmail will display your contact categories in the now-familiar table.)
Send emails to a contact category
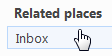 Let's now leave the contact list and go back to your Hotmail inbox: click on the Inbox link at the bottom of the list of links displayed on the left of the screen. Then, click on the New link to compose a new email: we will test sending an email to the contact category we just created.
As you start typing the name of your distribution list (contact category), Hotmail auto-suggests its name: hit Tab to accept the suggestion, and your email recipient is now a contact category! You can tell when your email recipients include a contact category, because the contact category contains a plus sign next to its name:![]()
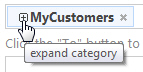 Aside from being a useful visual cue, the plus sign also has a functionality: if you click on it, it will expand the contact category into separate entries for each of its members (in much the same way Microsoft Outlook behaves with distribution lists). This means that you can easily use contact categories and then remove the few members you do not wish to email that particular time: click on the close button inside each of the contacts you do not wish to email.
And this is how you create contact categories, or distribution lists, in Hotmail!