Create Email Folders and Tags (Labels) in SeaMonkey Mail
 You can setup most email accounts using "
POP3", or using "IMAP" - two email protocols that most email and webmail providers support. In the case of POP email accounts, the only folders you'll get are the standard folders: inbox, drafts, sent, outbox, and trash. IMAP will give you those, plus any email folders you (or another authorized user) has created on the mail server. In this tutorial, we will show you how to create custom email folders to store emails in separate locations, and how to use "tags" (labels) to categorize and color-code your messages. On this page: email folders | email tags (labels)
Note: creating folders / subfolders in an IMAP account will add them and sync them with your "live" emails on the server.
File your messages with custom email folders
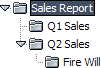 The most straightforward way to fight inbox overflow is to create folders: right-click on an existing folder, and choose "New Folder" from the context menu. Type a folder name and hit Enter / Return. Do that on your inbox to add "top level" folders, and right-click on your own folders to create subfolders: folders and subfolders are automatically sorted alphabetically.
Tip: adding a special character like underscore (_) or hyphen (-) forces folders named that way to appear at the top of the regular alphabetical order; same effect by using numbers.
If you don't see the folder you just created, its parent folder now shows a "disclosure triangle" which you can click to expand or collapse its subfolders. To change its name, right-click on it and choose "Rename Folder". To delete it (along with all its content not moved to another folder), right-click on it and choose "Delete Folder": that folder, and any of its content, will be moved to the Trash, from where you can recover it, for a time.
![SeaMonkey Mail's [Message] > [Move] submenus](../i/mozillaMail_subFolders.png) To move emails from your inbox to the folder you just created, drag it and drop it above the new folder name; hold down the control key (Ctrl) and click on one message after another to select several at the same time. To select "sequentially" (from one message to another, including all emails in between), click on the first one, press and hold down the Shift key, and click on the last one to close the range. Then, drag any of the selected emails, and all will be moved to the target folder once you drop! (Works just like selecting files and folders in Windows/Linux.)
To move emails from your inbox to the folder you just created, drag it and drop it above the new folder name; hold down the control key (Ctrl) and click on one message after another to select several at the same time. To select "sequentially" (from one message to another, including all emails in between), click on the first one, press and hold down the Shift key, and click on the last one to close the range. Then, drag any of the selected emails, and all will be moved to the target folder once you drop! (Works just like selecting files and folders in Windows/Linux.)
Tip: right-click on one or more selected messages, and choose "Move to" or "Copy to" to pick a destination folder. Be careful not to select Copy to by accident, as this will create duplicates of all the selected emails inside the destination folder.
Using Tags (Email Labels)
You may be familiar with the concept of "categories" in Microsoft Outlook: labels are the equivalent feature that SeaMonkey Mail (and Thunderbird) use. SeaMonkey comes with five default tags (pictured at the top of this page, they are: important, work, personal, to do, and later, each using a different color - tag names and colors can be customized).
To label an email, right-click on it and choose "Tags": then, pick a tag of your choice. As soon as you do, the message's text color in the folder listing will change accordingly: 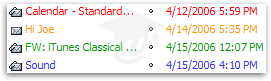
Tip: with an email is selected, press a number from 1 to 5 to assign the corresponding tag; to change tag, press 0 first to un-assign the tag - then type the number for the new tag.
Customize your tags
To use your own tag names and colors, right-click on any email, choose "Tag", and select "Customize" (notice that you can access these options from the Preferences dialog, under the "Tags" category). You will see a listing of the current tags, along with current colors:
- To rename a tag, type a new label for it (each tag name is an editable text box).
- To change its color, click on the swatch and pick something else from the color picker.
- To create a new tag, click on the "Add" button; pick a name and a color-code for it.
- Select a tag and click "Delete" to get rid of it (tagged emails will no longer show it).
- To automatically assign a low / high priority level to a message you label, select the tag and click either "Raise Importance" or "Lower Importance".
- Click "Restore Defaults" at the bottom to revert to the original five tags and colors.