Create / add a signature to Gmail emails
By default, Gmail has the email signature turned off (different from blank signature); but, just like regular desktop email programs, you can make Gmail automatically append a signature of your choice to emails you send from a web browser. If you check your Gmail account both from a browser and an email client like Outlook Express, Windows Live Mail, or Mozilla Thunderbird, you will have to separately configure the signature in your email program. In this tutorial, we will explain how to add an email signature in your Gmail account.
Access the Gmail signature settings
Follow these steps to configure your signature: (to create one, delete it later on, or change its content)
- If needed, first login to your Gmail account.
- Once in, click on the "Settings" link in the top right corner of the screen:

- Once the Settings screen loads, the "General" tab should be automatically selected (if not, click on it). Then, scroll about midway through the page, and you will see a "rich text box", like a mini text editor with formatting commands, labeled "Signature - appended at the end of all outgoing messages":
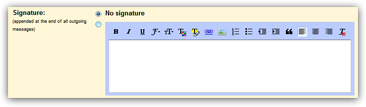
- By default, the "No signature" option is selected. The reason you have this option is to allow you to temporarily turn off, or disable, your email signature without actually having to delete it - and re-type it once you want your signature back on!
- To create a signature, simply start typing the text you want to automatically appear at the bottom of all emails you send (new/blank emails, email replies, or email forwards).
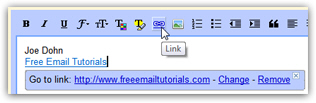
- Signature formatting: You can optionally use the formatting commands you see in the editor's toolbar; the vast majority of email programs are able to "read" this basic formatting information, as is the case with webmail clients (like Yahoo Mail, Windows Live Hotmail, etc.) Notice that as you start typing your signature, Gmail deselected the "No signature" option.
- In addition to basic text formatting, you can even add clickable links ("hyperlinks") and pictures to your email signature: (to add an image to your Gmail signature, you will first need to upload it somewhere - more details on that later).
- There are no "rules" to speak of when it comes to email signatures - just include the minimum needed for a contact to get in touch with you (remember that many people print emails, so adding a phone number or postal address may be a good idea as well).
- Once you are satisfied with your email signature, you have two choices: to start using the signature immediately, leave the "No signature" radio button as it is, unchecked;
- To save your signature to your Gmail account without turning it on right away, simply select "No signature" after have entered is text - Gmail will save the signature, but not display it at the end of email messages until you go back and manually enable it.
- Either way, finish by scrolling to the very bottom of the page, and click on the "Save Changes" button to accept your new settings (email signature plus any other option you may have changed at the same time).
- Gmail will save your new settings, and display a "Your preferences have been saved" confirmation message if everything went well.
- If you left the signature enabled, let's now test it: click on the "Compose mail" button in the left pane, to create a new email.
You should see the signature you created added at the bottom of your message, separated from the content of your email (the "email body") by a double hyphen, the standard way to indicate the start of an email signature:
And that's all it takes to create an email signature in Gmail, and have it automatically added to messages you send from your account (in a web browser).